Inspection Manager Enterprise Quality Management System
Automatic Ballooning of 2D Drawings and Inspection Plan generation
Organizations across the manufacturing Industry use 2D Drawings and 3D CAD models to communicate information with each other. Often times either the Design department or the Quality Department is responsible for ballooning of 2D drawings and Inspection Plan generation. Inspection manager’s Automatic Ballooning and Inspection plan generation modules enable organizations to generate these ballooned drawings and Inspection plans 70 to 90% faster in comparison to the same process done by hand, reducing the chances of error and enabling the engineers to work in more value-adding activities.
Inspection Manager uses Optical Character Recognition Engine which is an Industry 4.0 Machine Learning technology to automatically extract the GD&Ts, Normal dimensions and notes from the drawing.
| Manually | Using Inspection Manager | |
|---|---|---|
| Generating ballooning drawings and Inspection Plans | Can take anywhere between hours to weeks to generate ballooned drawing and Inspection Plan of a drawing | Can do the same activity 70-90% Faster in comparison to the manual method |
| Accuracy of ballooning of drawings | People are prone to make errors while ballooning dimensions by either missing them or repeating the same number in 2 places | Inspection manager achieves up to 90% accuracy depending upon the drawing quality to read the dimensions. It also has the white out functionality to easily detect which dimensions have not been ballooned reducing the chances of error |
| Accuracy of Inspection Plan generation | People are prone to make their own interpretations of the dimensions and GD&Ts | Inspection Manager interprets the dimensions according to the Universal Standards and has a comprehensive review process |
INSPECTION
MANAGER
Inspection Manager has all the tools you need to successfully manage your manufacturing quality process.
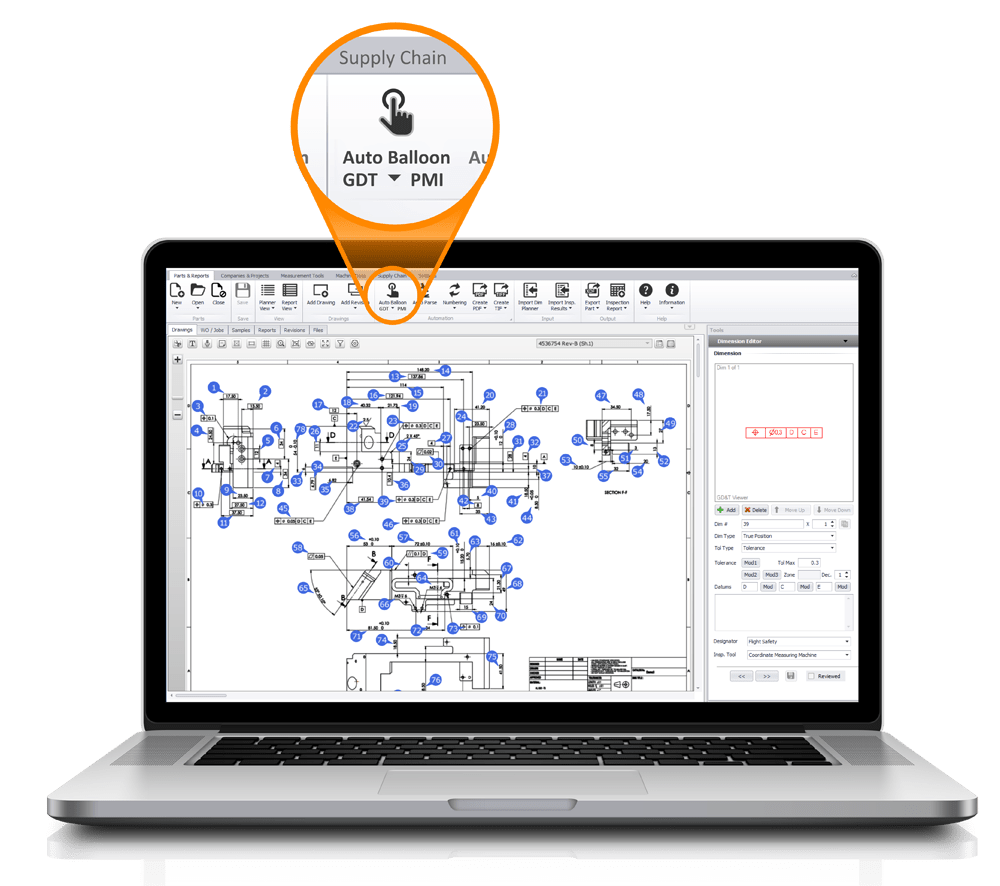
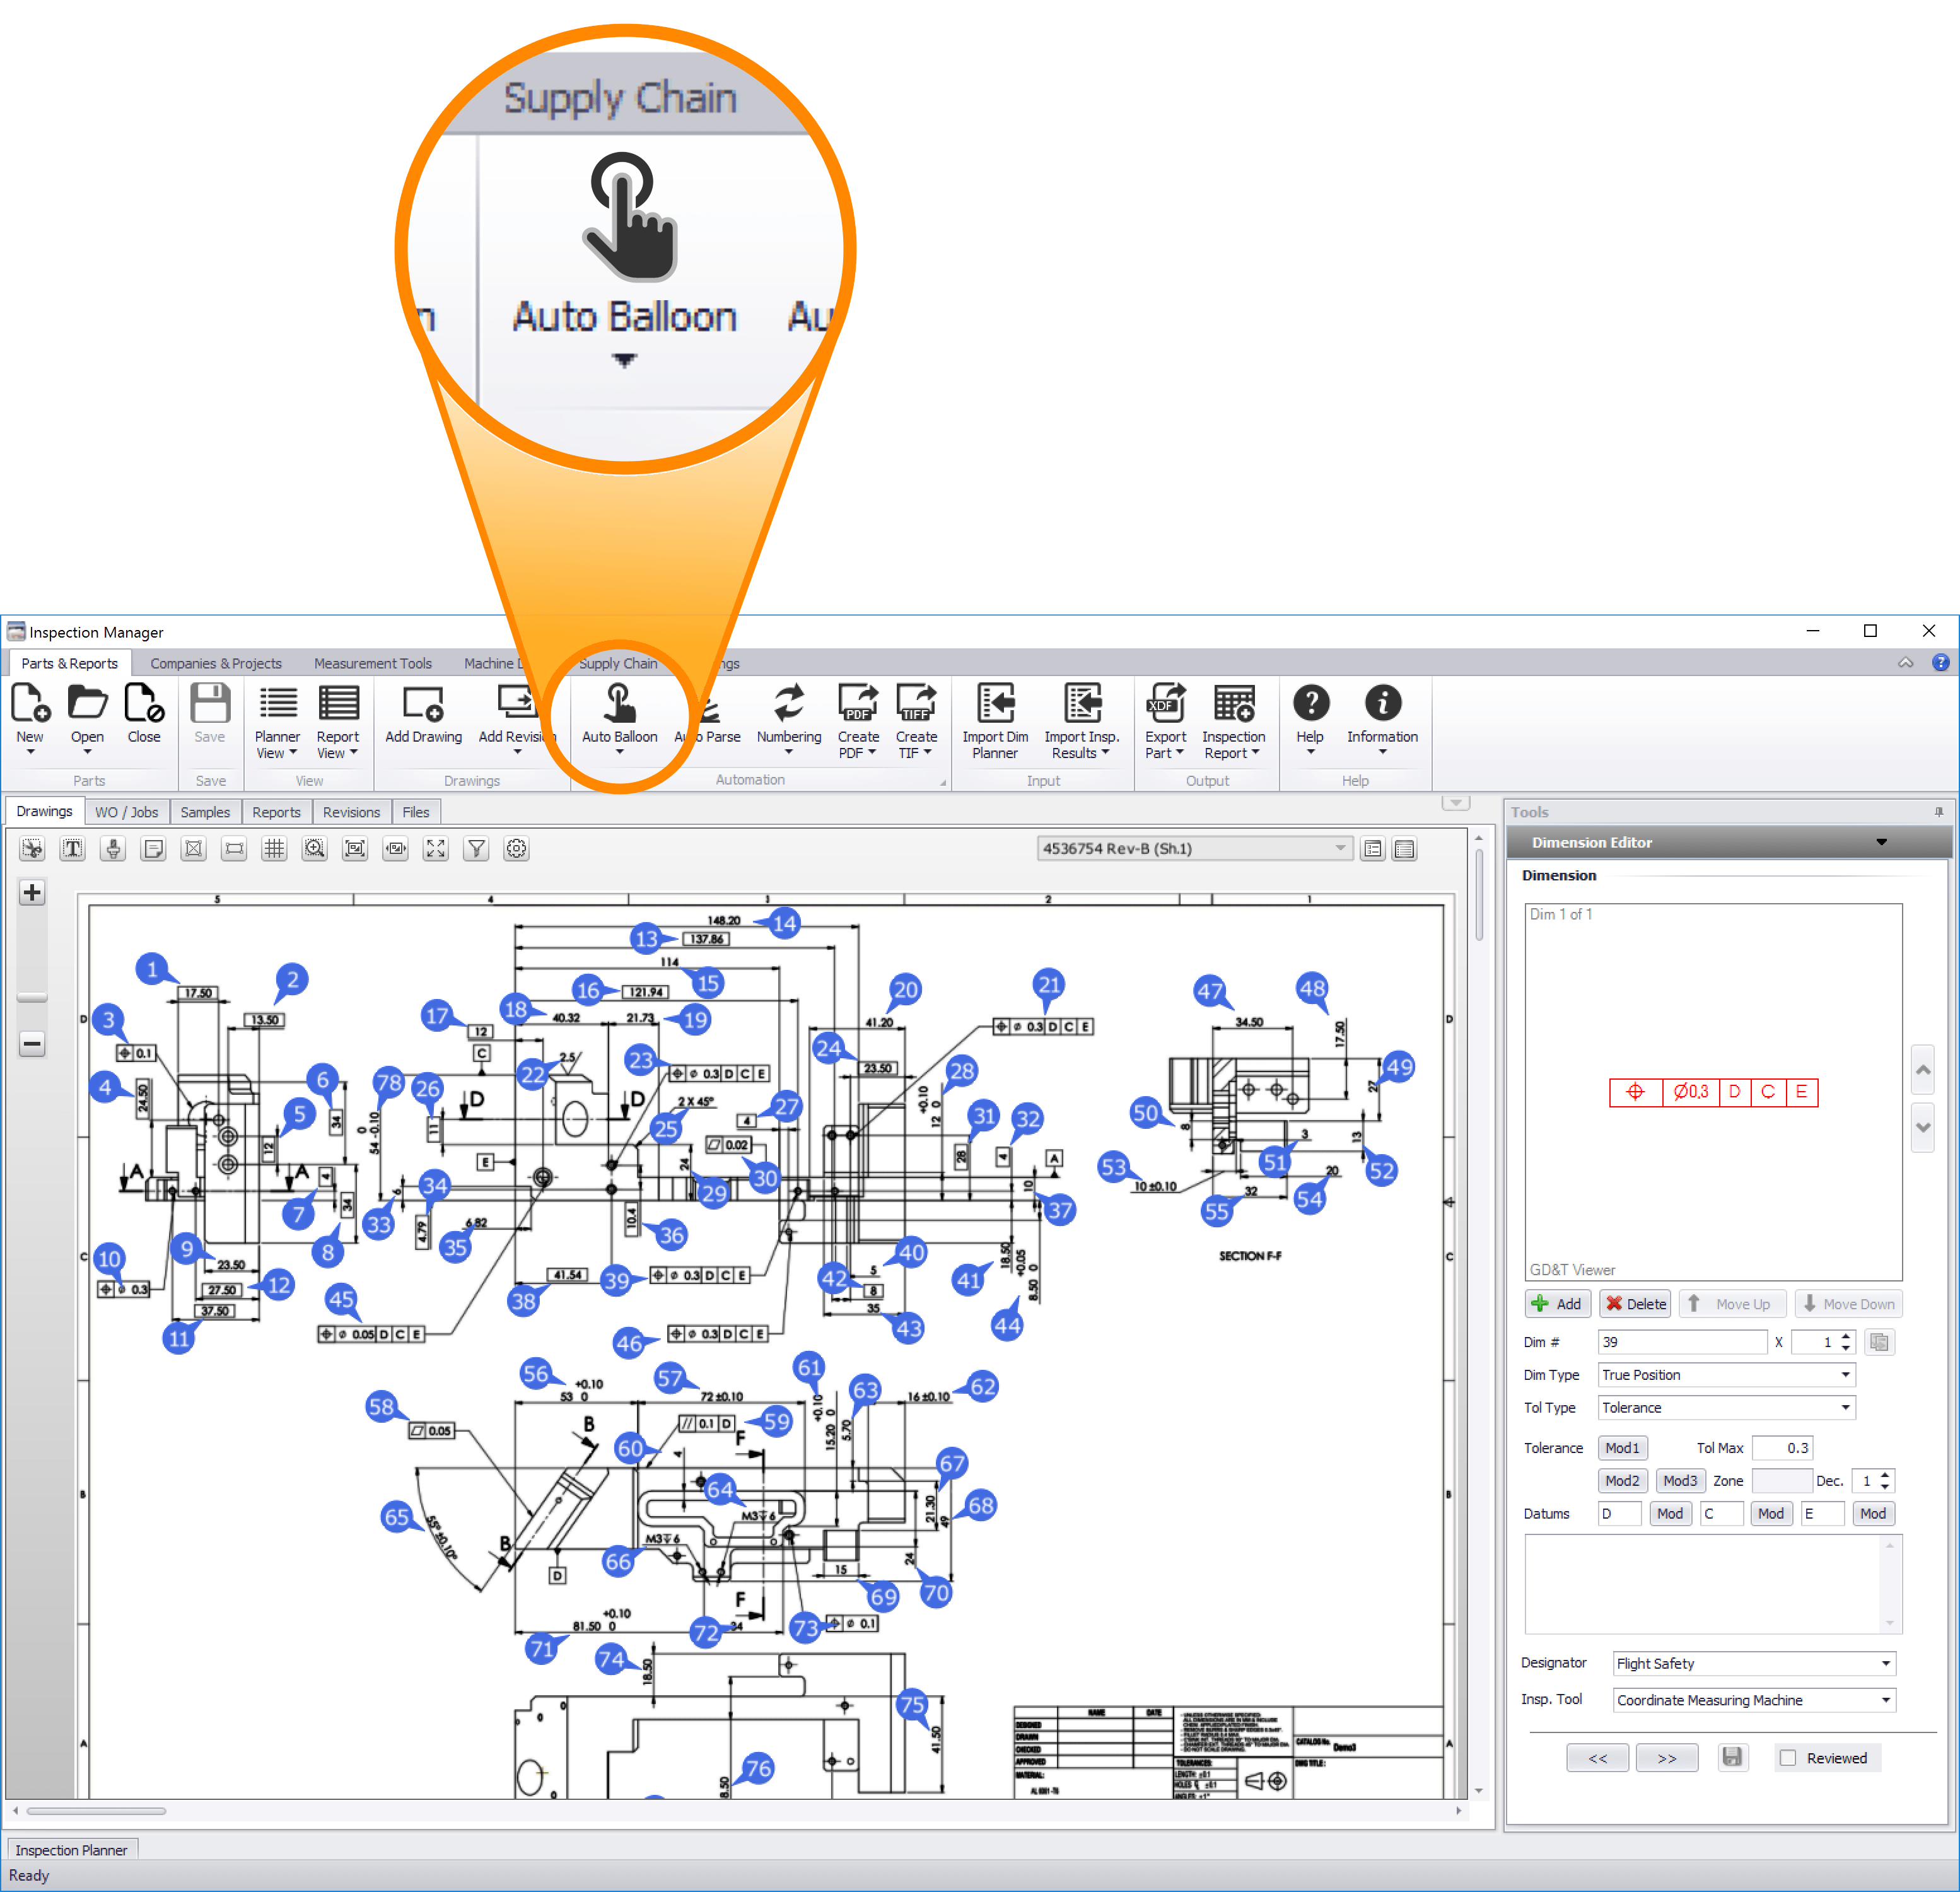
One Click auto ballooning and GD&T Extraction
One of the biggest challenges in the industry is to do ballooning of 2D drawings and generate Inspection plans using them. This process when done manually usually can consume time, is prone to human errors, and leads to unnecessary rework
Inspection Manager with its Optical character Recognition technology automatically assigns balloon numbers to dimensions on the drawing and automatically extracts the normal and GD&T oriented information from them, generating an Inspection plan. This reduces the amount of time required for the activity of ballooning of 2D Drawings and Inspection plan generation by 70 to 90% depending upon the quality of the drawing
3D MBD Auto-ballooning and PMI Extraction
Inspection Manager’s MBD module makes incorporating 3D models into your quality process simple.
3D MBD CAD models with GD&T and PMI information embedded in them are becoming more and more common, especially in the aerospace Industry. With Inspection manager Auto ballooning and PMI extraction has never been this easy before.
Inspection Manager enables –
- Extraction and editing of GD&T and PMI form 3D MBD CAD Models automatically
- Conversion of 3D views of a CAD model into 2D Drawings
- Extraction of the PMI notes from the 3D MBD CAD model
- Generation of Inspection plan from the extracted Information
As soon as the 3D MBD CAD model is opened Inspect the Inspection manager, automatically all the GD&T and PMI data will be ballooned and their information intelligently extracted. The views of the CAD model can also be converted into a 2D drawing inside the software itself.
All this information then can be further automatically processed into an Inspection Plan
All major CAD systems’ native 3D models are supported.

In-Depth AQL Based Sample Planning
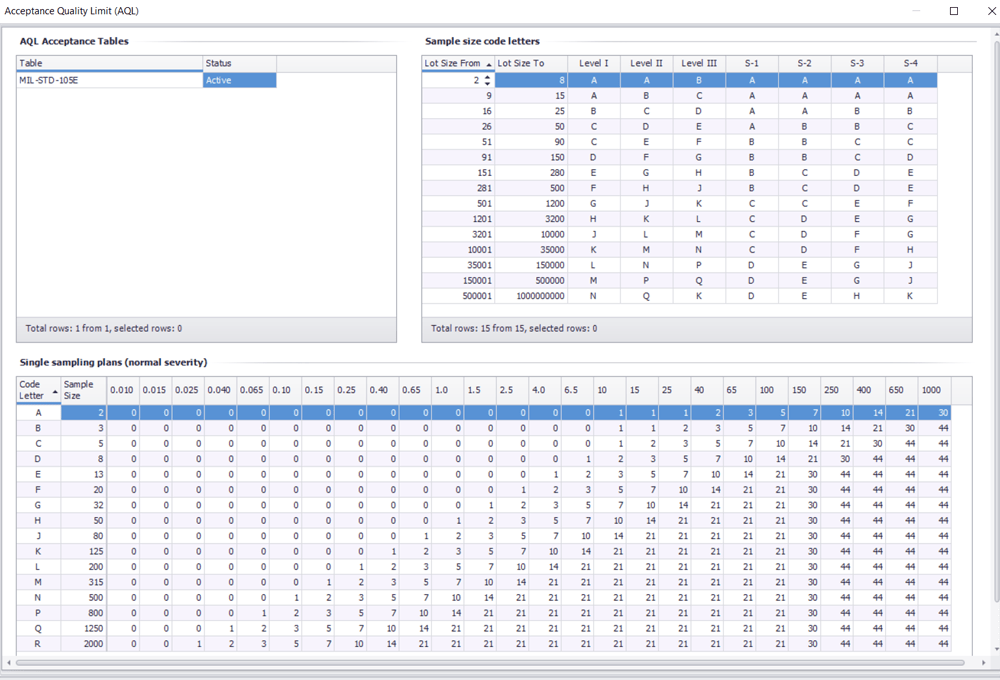
Inspection Manager comes with an inbuilt Acceptance Quality Limit (AQL) based sample planning which enables the customer to generate the right number of samples within a click. These Plans can be built and applied to tasks, jobs lots and orders.
Sample planning in Inspection manager follows MIL-STD-105 and Z1.4AQL standards as well as supports a variety of tables
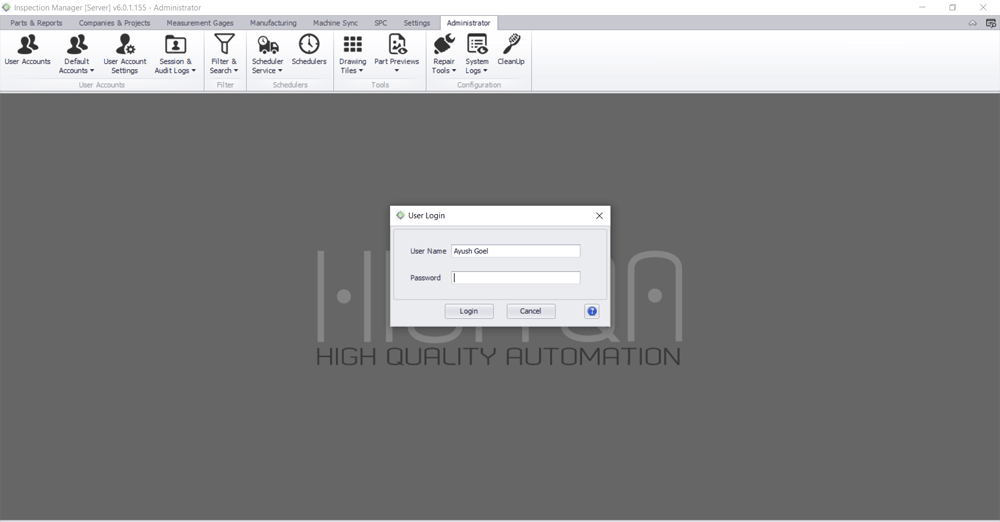
User Access Control for Part Security
Security of Information is a need in this IT- driven era. Inspection manager enables organizations to have strict user control groups and user roles so as to restrict the functionality as well as access to information depending upon where they stand in the hierarchy. This can be done with limited intervention from the IT department after set up of the system.
Manufacturing Key Sets
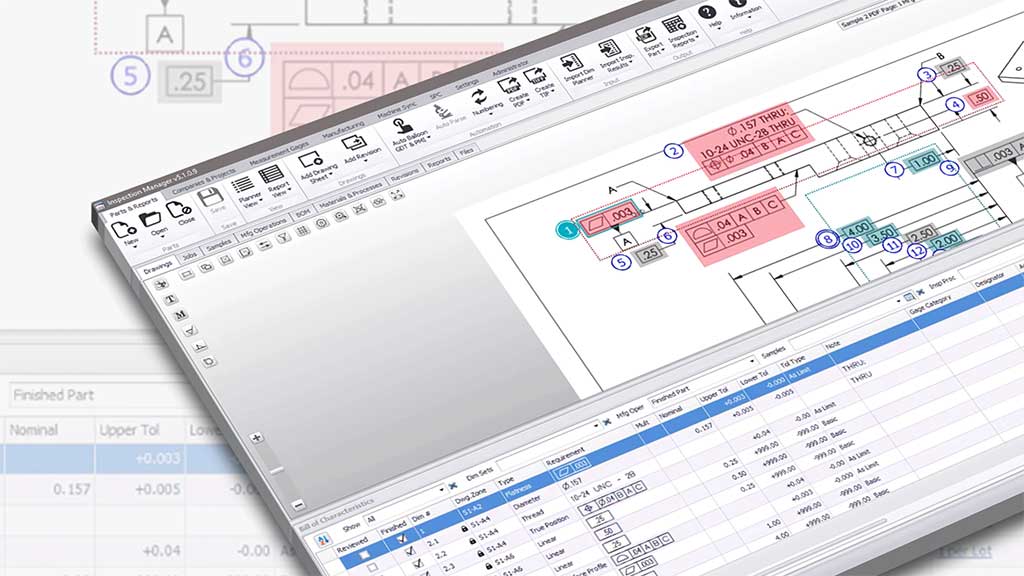
Using different types of cutting tools to manufacture different profiles is a standard in the industry. Inspection Manager enables grouping various dimensions affected by the same cutting tools to be color coded by the same color. This adds another layer of information over the AQL based sampling and the Inspection plan to enable the manufacturer to optimize their quality planning
Integrated Tools & Gage Management
Tool and gage Inventory management is an activity taken by organizations in one form or the other. Either they use a separate software or Excel to track their tools. Inspection Manager goes well beyond these traditional solutions by integrating it in an environment where the module can interact with Live Inspection
For example, if a tool is out of calibration in the tool and gauge inventory module of the software, Inspection manager would not allow it to be selected during the inspection process on the shopfloor unless someone above the operator in the hierarchy allows it
Integrated Tool and gage management enables –
- Calibration tracking and management of the tools
- Location Tracking of the Tools
- Automatic Mail triggers before the tool goes out of calibration
- Filters to find the tool usage by part, job, Inspector
- Connectivity to Bluetooth and wireless Devices Etc


In-Process and Final Inspection Plans
Manufacturing and Quality departments always communicate with each other via a framework of documents, Inspection manager enhances this framework by building up a common set of standards and language between the two departments leading to a reduction in interpretation and data entry errors.
This feature also eliminates duplication of labour, reduces material waste, and ensures the availability of correct and reliable data. Real-time warnings allow for timely corrective action to avoid wasting resources.
This enables the organization to –
- Reduce the amount of re work
- Reduce the number of ECN changes
- Have on demand data
- Have clean data from which information can be easily extracted
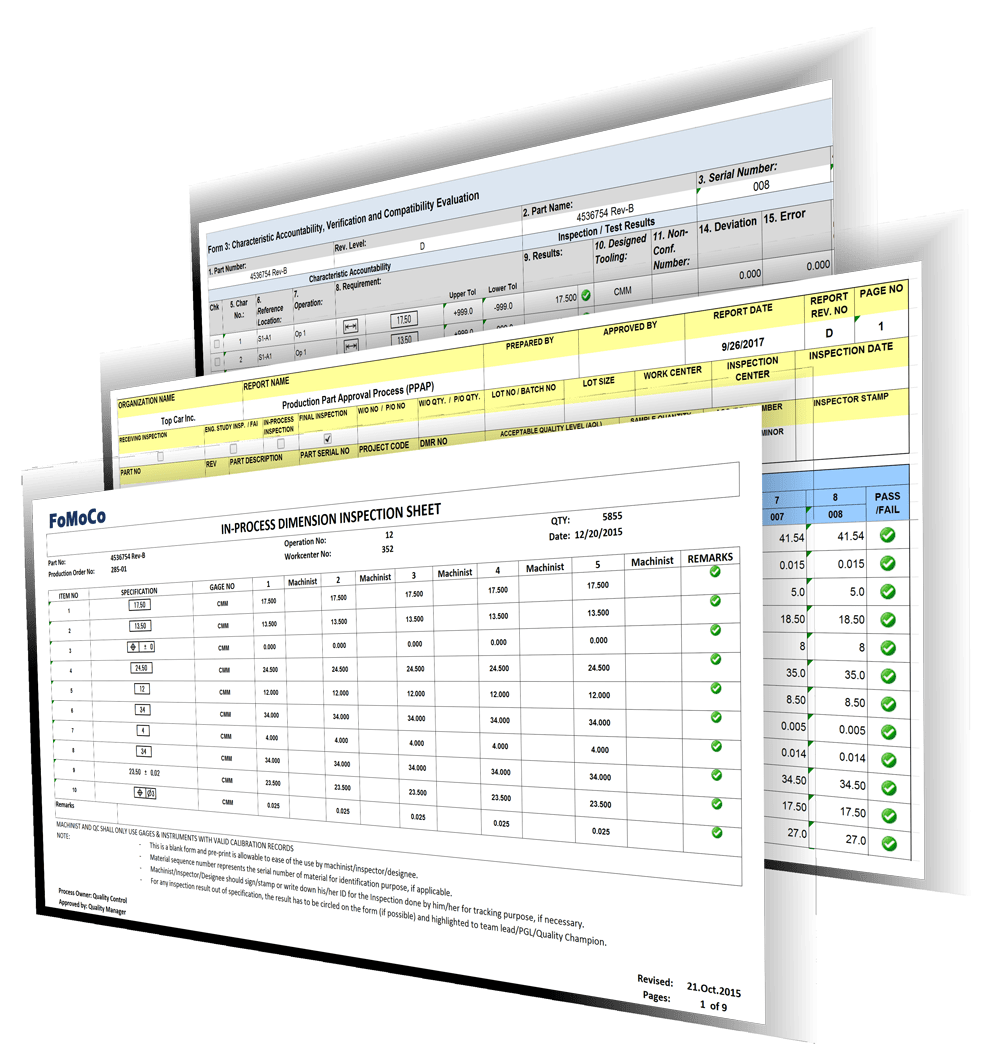
Printed process documentation and reports are no longer necessary with Inspection Manager. The paperless manufacturing quality management software allows users to see and enter inspection results with the click of a button on a tablet or PC, depending on their permissions. All inspection results are automatically saved in a single database that is easy to access. Many firms that still use paper documentation can use forms to enter process information. They are saved to the database automatically as Excel CSV files and can be printed as needed.
These reports can also be exported in any format according to the requirement of the customer. Multiple templates can be customized according to the requirement of the customer.
