Gear Roll Testing Machines
by GearTec
GEARTEC.CZ is a Czech Manufacturing company that makes Gear Testing machines and supplies them all around the world. Geo Informatics is one of the organizations that represent them in India.
Geartec and its roots in German and Czech academia helps them to build one of the most robust gear testing machines across the globe which not only get a lot of inputs from research but are also live tested by gear manufacturers in the development phase of the machines.
This approach makes them a truly unique and innovative organization in their approach towards Gear testing Machines.
GEARTEC
FEATURES
What are gear Roll Testing machines and what are the methods of testing they employ?
Gear Roll testing Machines are used to check various functional and dimensional parameters of a performance of a Gear.
These machines are either custom-built or standard built according to the requirement of the Customer.
Methods of Gear Roll Testing
Single Flank Gear Roll Testing
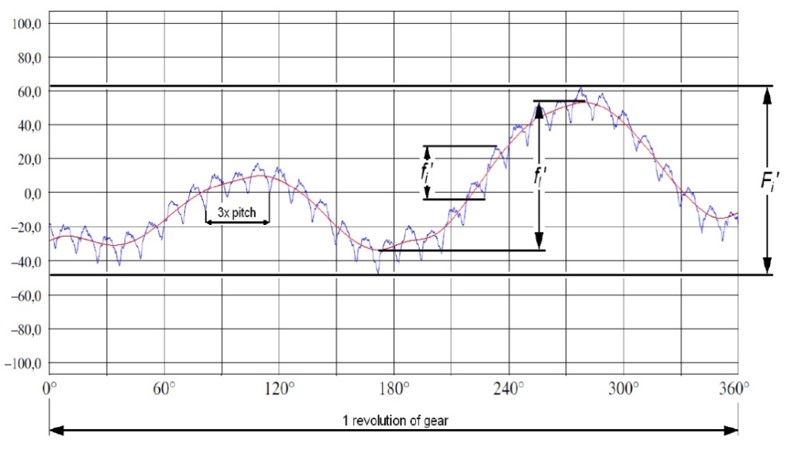
Single Flank Gear Roll Testing is a highly sophisticated and accurate method of measurement and evaluation of gears where both left and right flanks are measured individually in fixed axis distance and/or required position of backlash.
These single-flank deviations will be evaluated using the Gear Testing Machine
Fi´- tangential composite deviation
fi´- tooth to tooth composite deviation
fl´- longwave component
fk´- shortwave component
j – backlash
Fp – total pitch deviation
fpt – adjacent pitch deviation
fu – difference between adjacent pitches
Fr – radial runout
Contact pattern, V/H cycle, FFT analysis

Principles behind single-flank gear roll testing machines work are –
- Mounting distance must be fixed during the measurement process
- Both the flanks are tested separately
- Both spindles are equipped with high-precise rotary encoders
- Transmission errors will be calculated
Double Flank Gear Roll Testing
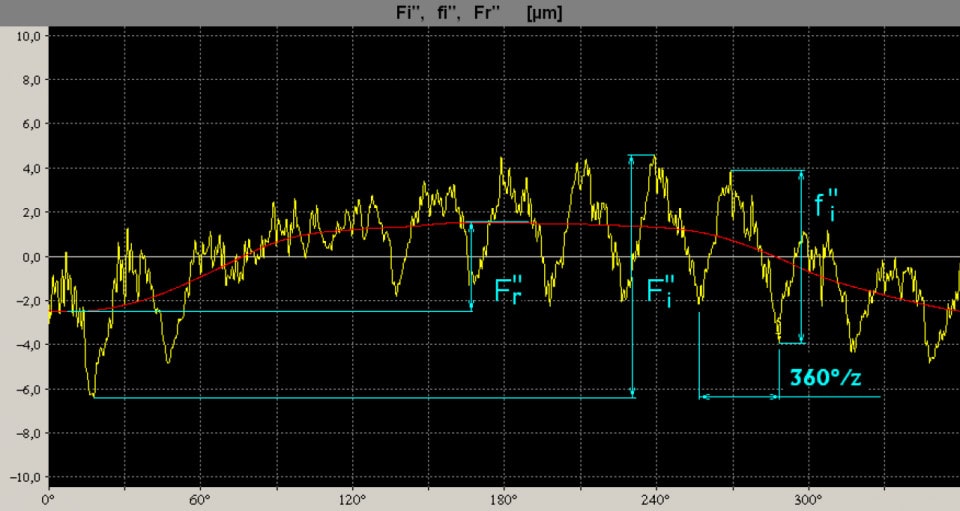
Double-flank gear roll testing is a popular method of quick and inexpensive measuring of gears. This process of testing will help the customer to identify damaged parts in their batches, provides data of double-flank deviations, fluctuation of axis distance and information on the radial runout.
The following technical parameters would be evaluated –
Fi” – total composite error
fi” – tooth to tooth composite error
Fr” – average value of radial runout

Other measurable and evaluable deviations:
j – backlash
Aa – fluctuation of axis distance
Mz – measure over teeth
Mdk – Measure over pins/balls
Double-flank gear roll testing inspects your gears flanks (left and right) simultaneously with constant force in radial direction. Tooth error(s) cause deviation of axis distance which is evaluated by well-known standards Such as –
DIN
ISO
AGMA
JIS
JGMA
BS
